Reverse engineering the lighting in a photo is excellent practice for improving as a flash photographer. If you can mentally decode the lighting positions in another photo, you can apply the same lighting techniques to your own images. Thankfully, the laws of light have never changed so there are plenty of tells in an image to find information on the lighting technique used.
Catchlights
Catchlights are the reflection of a light source in the eye. They are often the easiest way to get information about the type of light modifiers and position of a light source.
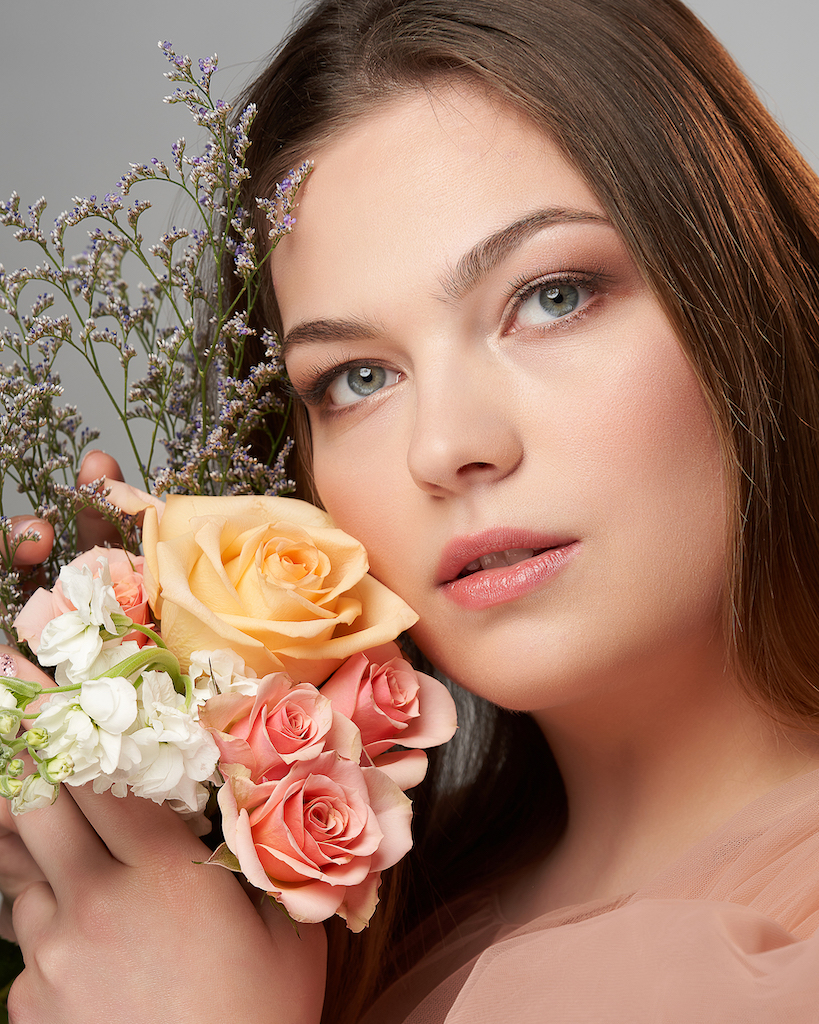
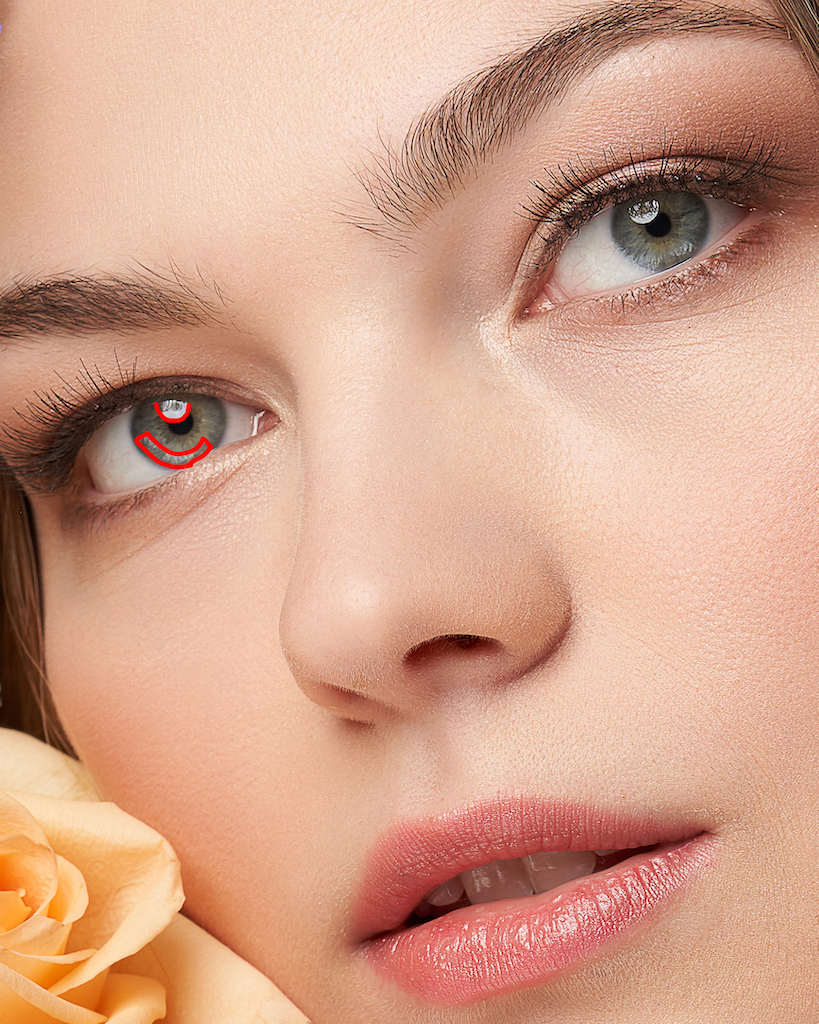
In these images you can clearly see a circular catchlight at the top of the subject’s eye. If you look closely, you can see that there is a smaller circle in the center that is less bright than the rest of the catchlight. This means we have a light source that is circular, but with something blocking the center. The lighting setup is very clearly using a beauty dish as the key light.
But wait, do you see the second catchlight? It’s less intense than the primary one, and not circular. Instead this has a crescent shape to it. That is from a curved reflector placed below the subject, bouncing light from the beauty dish back upwards to fill in the shadows.

Sometimes, catchlights don’t give us enough information. Depending on the light position, there may be no catchlights visible in the eye. Additionally, some photos aren’t close enough to see important catchlight details. Catchlights also don’t tell us anything about the other lights in an image, like the background and hairlight used in the photos above.
Shadow Direction
When you can’t get any information from a catchlight, it’s time to start looking at other lighting characteristics. The second thing I look for is shadow direction. Even without a catchlight, you can identify a light source’s direction based on the direction of the shadows in an image.
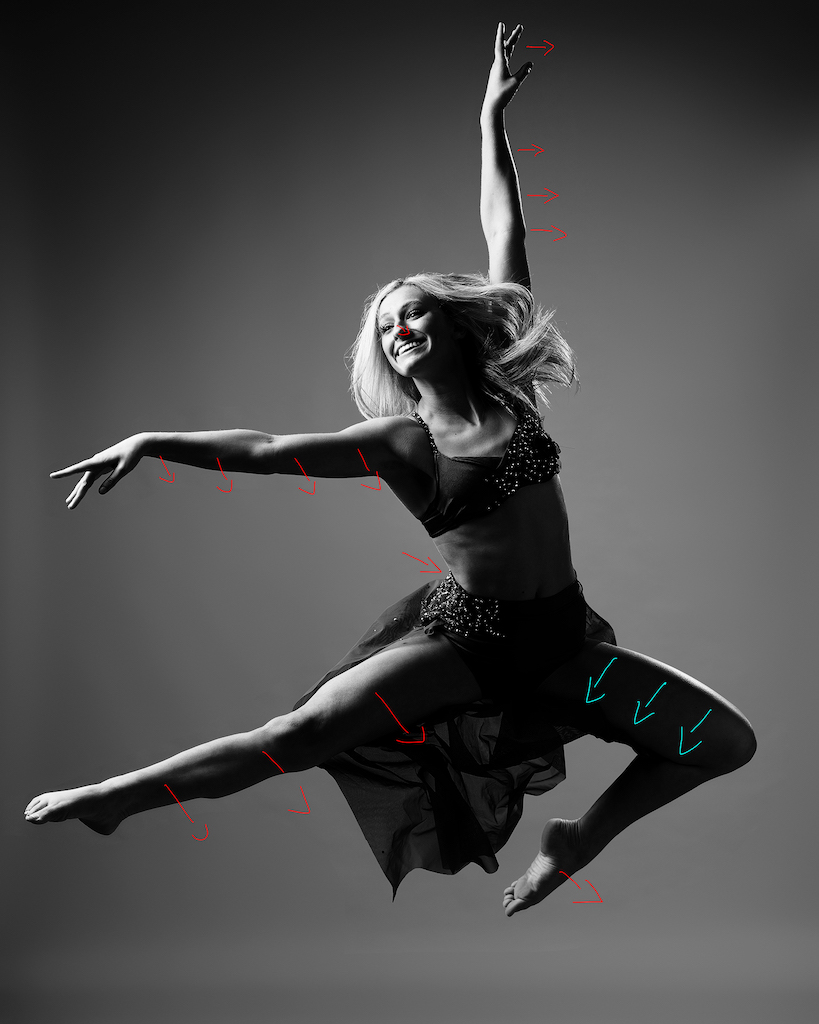
In this image, you can see the shadows are primarily traveling downward and to the right. This means that the light source has to be above the subject’s face, from camera left. In addition to the key light (primary light source lighting the subject), you can see a slim highlight that breaks up the shadow. This shows that there are at least two lights illuminating the subject, and that the second light is coming from camera right.
Light Quality
This same image shows clear differences in quality of light between the two modifiers. The most common description of light quality is hard light or soft light. The light source on the left has soft qualities because the light gradually transitions from light to dark. The light source on the right side has hard qualities, because the light rapidly transitions from light to dark. This tells us that the light source on the left side of the image is larger (or closer) than the light source on the right side of the image.
Light Falloff
If there’s anything a photographer using off-camera lighting should know, it’s the inverse square law. It’s a mathematical equation that defines the rate at which a light source transitions from light to dark. Put simply, when a light source is closer to a subject it transitions from light to dark more rapidly. We can use this to estimate how close a light source is to a subject and if you’re not afraid of math, you can calculate it exactly.
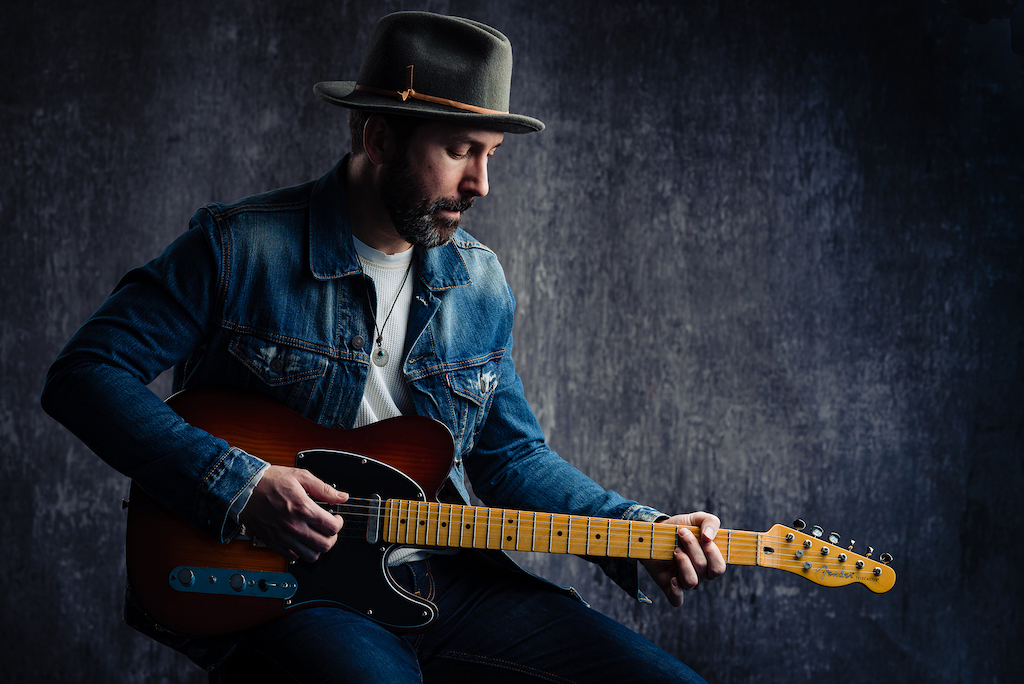
From the previous points, we can tell that the above image was lit with a large light source camera right. But, just how close was it? To decipher this, you can look for a repeating tone like a skin tone or in this case, the denim jacket.
Look closely at the two sleeves of the denim. Do you see how the subject’s left arm (camera right) is significantly brighter than the subject’s right arm (camera left)? The light falloff tells us exactly how far the light is from the subject. The inverse square law states that light intensity is inversely proportional to the square of the distance. This means every time the distance between a light and subject doubles, the light intensity will drop 2 stops (-75%). Just from eyeballing it, the subject’s right arm looks about one stop darker than the subject’s left arm. His arms look about two feet away from one another, meaning the light is about two feet X 1.4 (the change in light distance for one stop difference). So, in this image, I would estimate the light is roughly three feet away from the subject’s left arm.
Hopefully with these skills up your sleeve, you can more easily spot the lighting decisions made in any image you find!