Today, I’m going to walk you through my process for creating this fitness apparel portrait of model Jenna Ode (@jennaode).
Edge Lighting
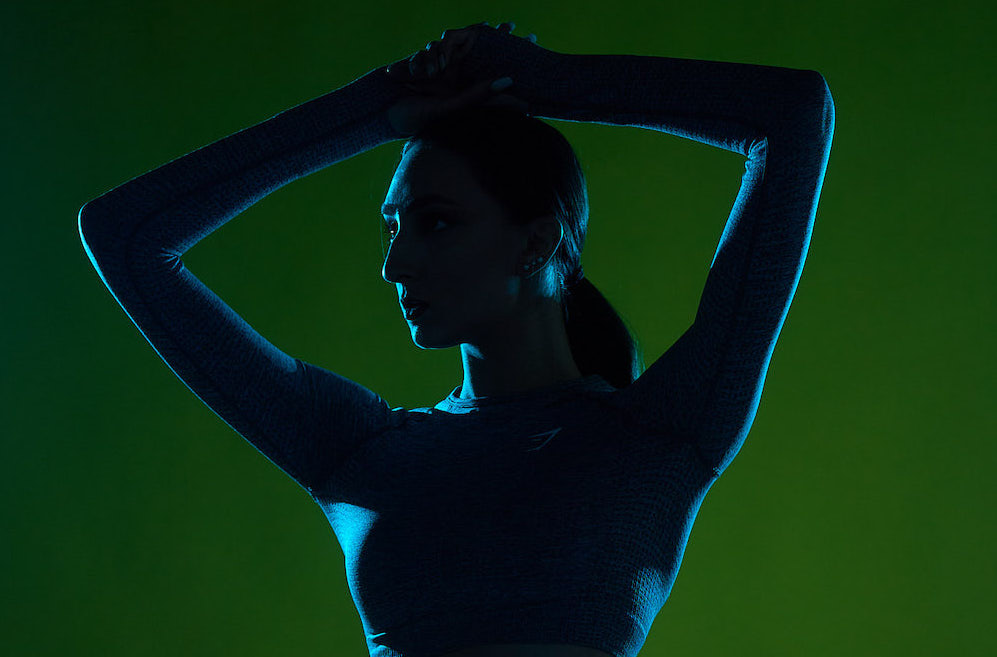
To start out, I ran a test shot firing the rim accent lighting — two Xplor 100 Pros — with one on each side of Jenna. Each light also had an aqua gel. In this shoot, I was looking for coverage. I wanted the lighting to be far enough away to create a distinct outline on the models entire body. I did this without any front lighting, so it was more clear what the rim lighting was doing.
Background Color with Godox SZ150R LED
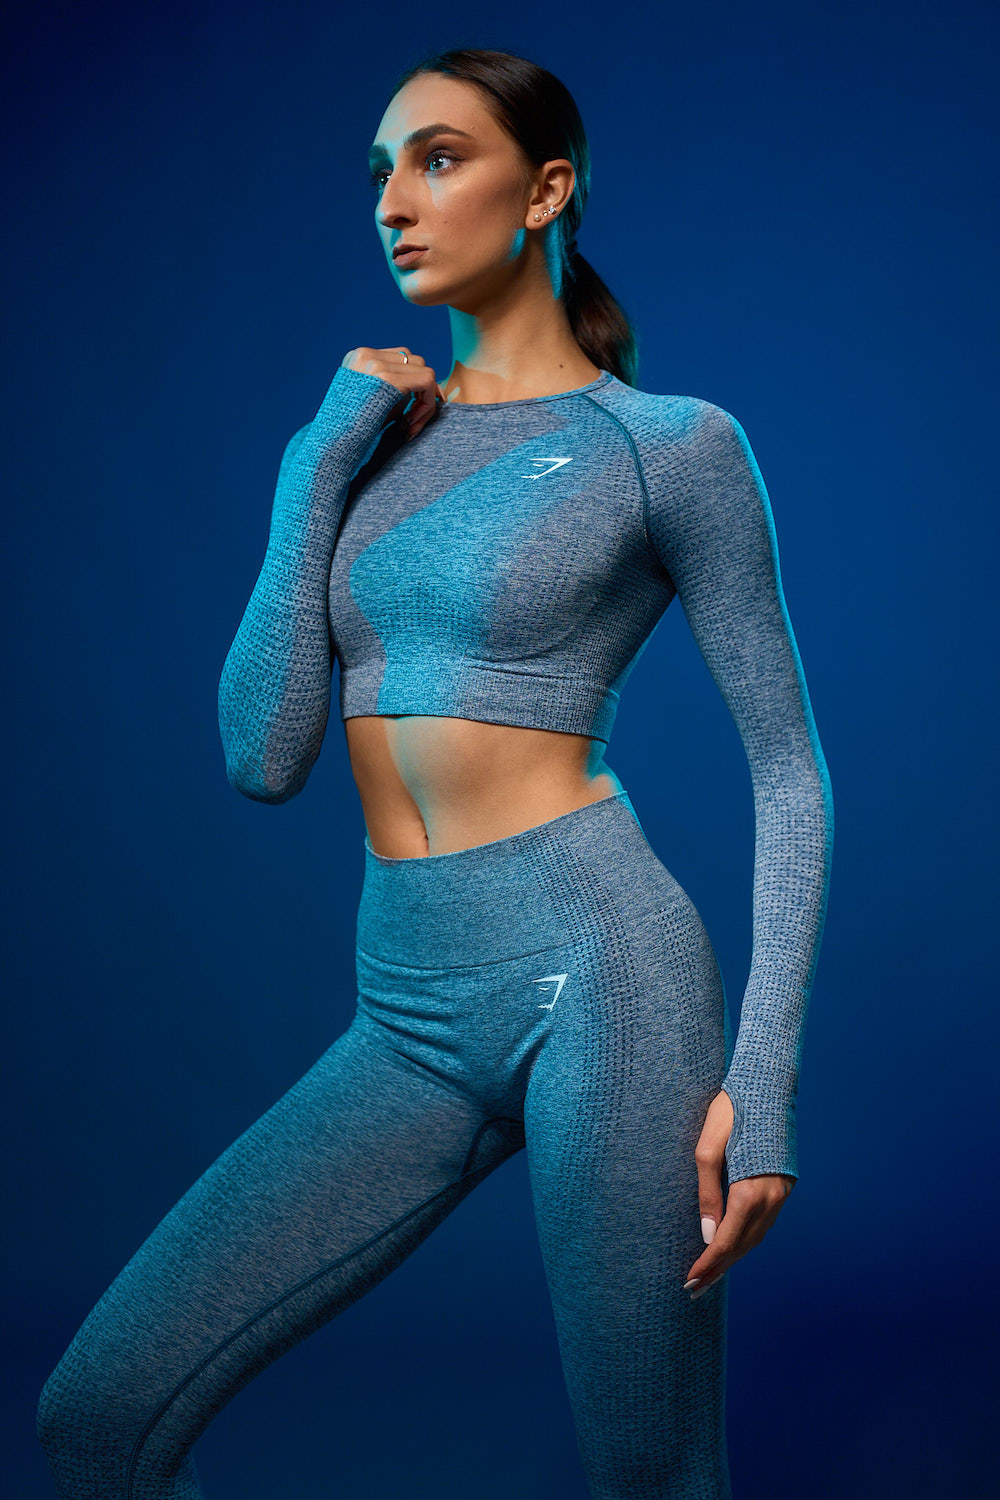
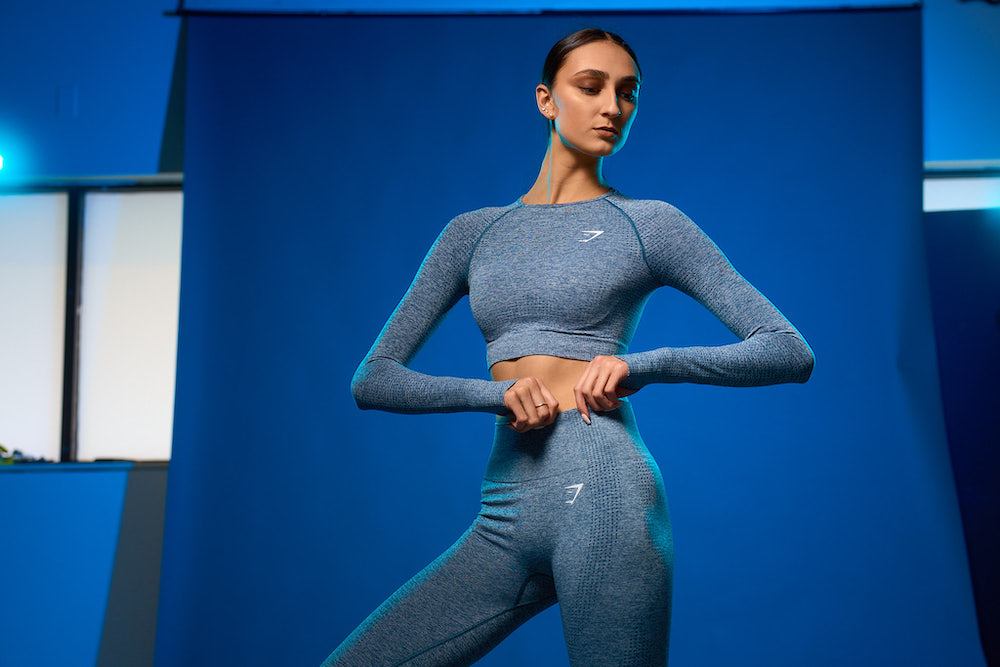
Jenna had chosen this matching gray workout set, so the first thing to do was pick colors that would work well with it. I was set on the bright aqua edge lighting, as I felt it worked well for the athletic aesthetic and complimented her skin tone. The apparel stitching also had a cool hue to it. I still needed to pick out a background color, so I pulled out my color sampler.
The Godox SZ150R is a COB LED light that offers full RGB control. The COB aspect allows me to use it with any of my Bowens modifiers, and the RGB lets it create any color. It also has some special FX modes, such as strobe lights and ambulance lighting. In this instance, I used the SZ150R’s color pulse mode to quickly expose me to various background color options. I simply used the color pulse effect so it would change hue every second. Then, I captured some sample portraits until I found the deep blue background color I liked most.
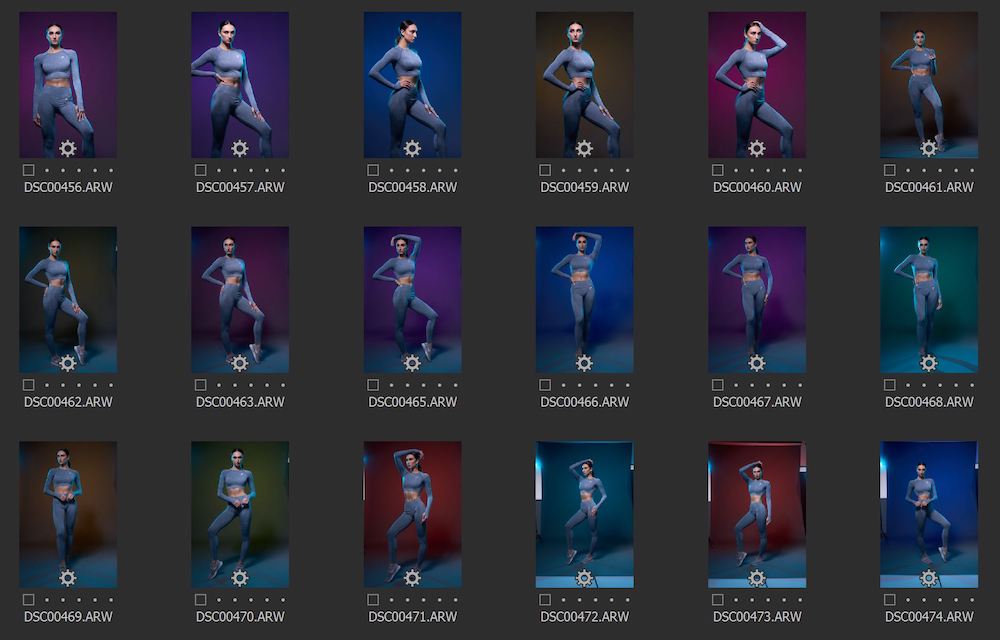
When I use LED for portraits, people commonly ask if it’s as capable as flash. The answer is absolutely not. The LED works in this scenario because it’s in the evening, so there is very low light in my studio. If any form of sunlight was coming through my windows, it would reduce the saturation of my LED and make my background much brighter.
Additionally, the model’s posing is stoic. Jenna pauses to hold each position. If instead the poses were dynamic, the LED lighting would introduce motion blur. Of course, I could increase the shutter speed, but then I’d be reducing the brightness of the LED lighting. Overall, it’s very limited scenarios where LED can be used in place of flash.
Key Light
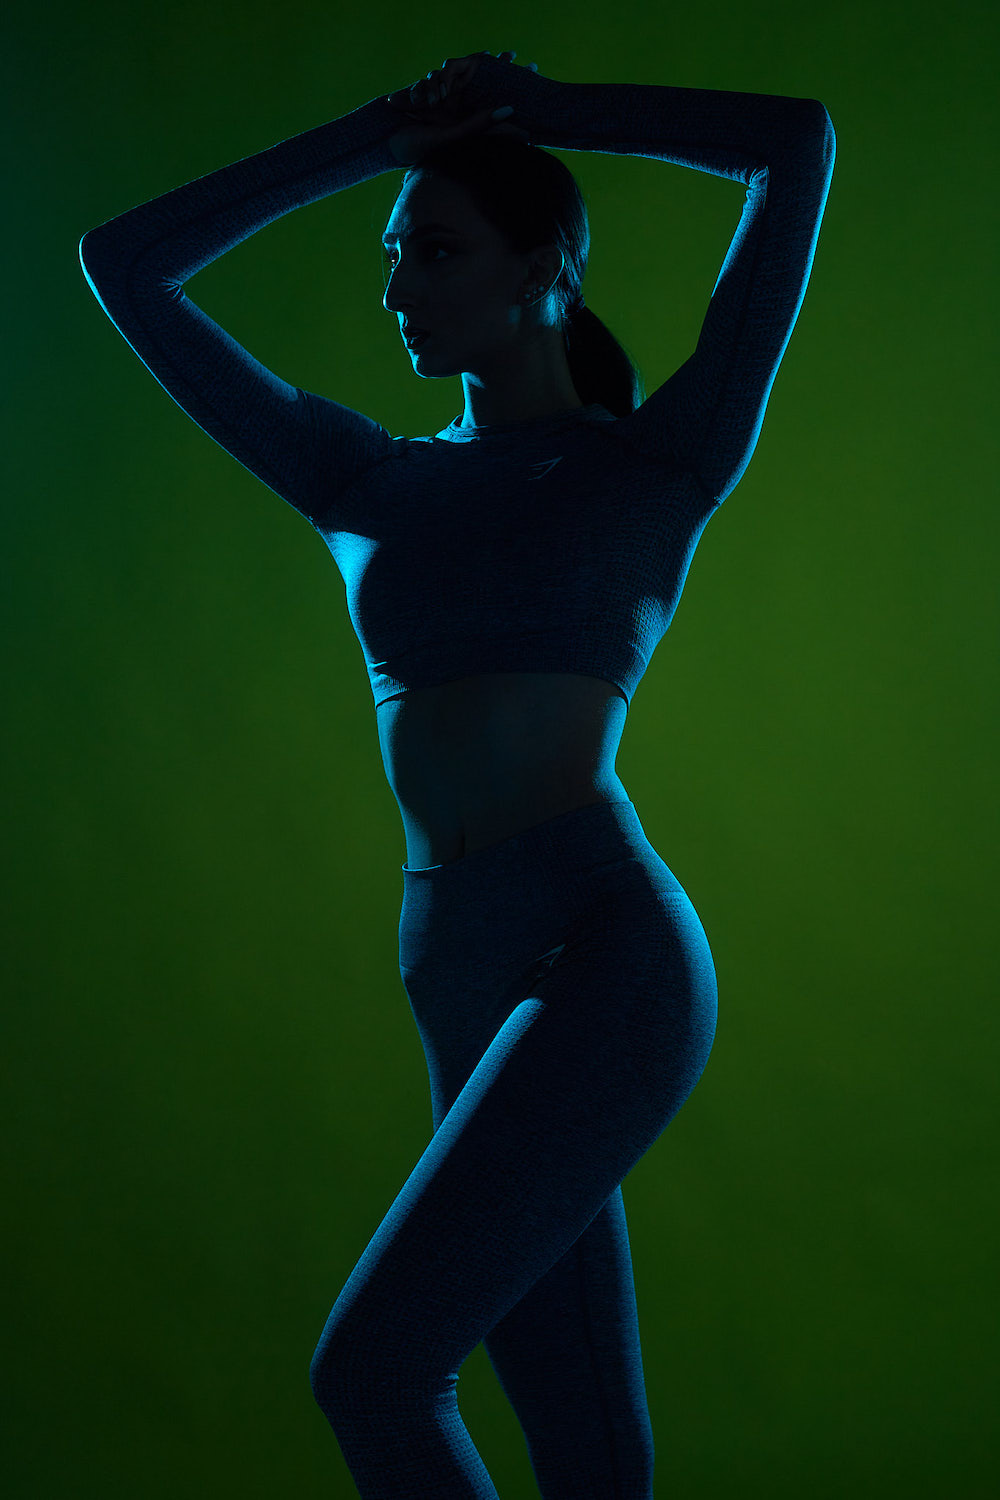
For these images, I used a 28” beauty dish on the Xplor 600 Pro. I had this boomed overhead on an extension head, to use the body of the Xplor 600 Pro on a super clamp as a counterweight.
Responding to Issues
I did notice that, if the talent rotated far enough in either direction, the blue rim lighting would reach onto the front of the clothing. This dramatically alters the perceived color of the clothing. Also, if she had her arms up, that would create a cast shadow onto the clothes, making the color even less clear.
The Final Pose
For the above reasons, I looked for poses where Jenna’s arms stayed low to avoid these cast shadows. I made sure her shoulders did not rotate to the point that the light could reach the front of the clothing. Jenna turned her nose away from the beauty dish, creating this beautiful combination of broad lighting with a rembrandt pattern on the short side of her face.
People may look at this final capture as an extremely loose composition, but I love the flexibility it provides. The subject has enough background surrounding her that I can crop vertically, or extend the background on the left and right. I could have used a longer lens and photographed from further away to create more background compression and fill the frame. Although, I felt the 50mm focal length was ideal for creating more length in the subject.
Post Processing

For post processing, there were basic adjustments such as color and contrast in Capture One. Skin healing, minor local D&B, global D&B, and background smoothing were done via Retouch4me AI editing actions. The ear cast shadow, blue highlight on neck, and fly aways were removed via Frequency separation. The rim lighting was enhanced via manual doding, before finally sharpening and adding grain to the portrait.
Stay tuned for more Photo Lighting Breakdown at Flashpoint’s Creator Blog!
Article and Photos by Robert Hall